
There are so many ways to bead a lucet cord. My book, Learn to Lucet covers 2 different methods, but those two are just the tip of the iceberg.
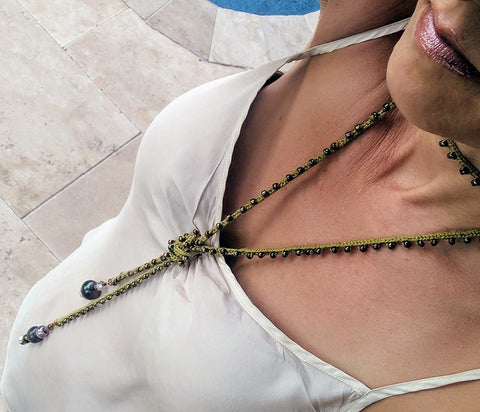
In this cute necklace project, I show yet another way to create a beaded cord, this time with a beaded gimp cord.
I used scrap yarn and beads that I had laying around the house for this project. I love it when I create something new and fun to wear with components that had just been laying around collecting dust.
Scroll down below to see how I made it.
MATERIALS
For the cord:
DK Weight scrap yarn
Size 6/0 Seed Beads
Lucet
Steamer
To complete the lariat:
(2) beads with hole large enough to accommodate 4 strands of your DK yarn
(2) jump rings
Tapestry needle
Big Eye beading needle
(2) head pins
Round nose pliers
Beads of your choice to thread onto headpins to create the lariat dangles

Step 1- Make Beaded Gimp Cord: I made a 54” beaded gimp cord. To make the cord, I made a cord with 1 gimp with a small tweak to the process: I strung beads onto my gimp cord before using it.
I used the same yarn for both the gimp and the main cord. Since I use the no-turn method to make my cord and I followed a simple beading pattern. Every other time I brought my gimp to the back, I scooted a bead up to be caught on the side of the lucet cord facing me. In this way my beads are evenly spaced on every other strand facing the front of the work. One other key thing I did was to leave a 4” starting and ending tails for use later on when beading the ends.