
Arm Knitting
There are already some wonderful tutorials for arm-knitting online. If you already know how to knit, all it takes is 5 minutes of your time watching an arm-knitting tutorial video to get the idea of how to cast on and knit. One of our favorites on YouTube is Arm Knitting for Beginners. Another great Arm Knitting tutorial series is published online at Flax & Twine. And don't overlook the fact that you can purl as well as knit on your arms, see Vickie Howell's great video tutorial.
For arm knitting you need a big gauge yarn, because you've got big gauge wrists! While a lot of the information already out there for arm knitting shows many strands of yarn held together to achieve this big gauge (and this is a very swell option!), Feza 3N yarn is perfect for arm knitting because this huge gauge yarn is sized perfectly for the human wrist.
A few key points to keep in mind when arm knitting:
- The same side of the work is always facing you- you don’t turn your work. This is kind of like circular knitting in that the right side of the work is always facing you, except with arm knitting you are working flat instead of in the round.
- You can both purl and knit while arm knitting in essence you can translate just about any stitch pattern to arm knitting - but you do need to keep the following fine points in mind if you don't want to twist your stitches. If you do want a twisted-stitch look, that's okay too!
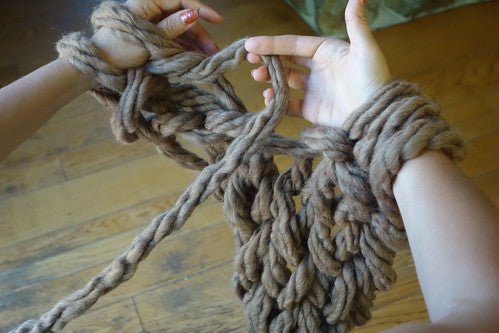
Knitting from the Right Arm (to the left)

Step 1: Grab a loop of the working yarn with your right hand, free end of the loop first.
|
 Step 2: Pull this loop through the stitch on your wrist, letting the stitch on your wrist slip off. Without twisting the stitch, slip it over your left hand onto your left arm. |
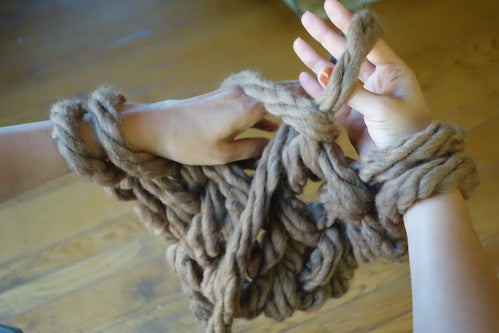
Knitting from the Left Arm

Step 1: Insert your right hand into the FRONT of the stitch on your left arm.
|
 Step 2: Pull working yarn from back over right hand and onto right arm. Make sure to keep working/free end of loop to back of arm and front strand of loop will be connected to the stitch that was previously made on the right arm. |
Purling from the Right Arm
|
|

Step 2: Bring working yarn through the stitch on the right arm, keeping working end of the loop to the front of the hand. Let the stitch on the right arm slip off.
|

Step 3: Without twisting the loop (keeping working end of the loop to the front of the arm), slip the newly-formed loop to the left arm.
|
 Step 1:
Purling from the Left Arm

Step 1: With working yarn in front of the work, insert the right hand through the forward loop of the stitch on the left arm.
|
Step 2: Grab the working yarn with the right hand and bring it through the stitch on the left wrist, letting the stitch on the left wrist slip off.
|

Step 3: Bring the stitch over the right wrist keeping working end of the yarn to the back of the wrist.
|